Intro
Why am I writing blog posts?
I have had a self-isolated mentality for most of my career in tech where I often don’t share things I have discovered publicly other than with open source code and word of mouth between friends and colleagues. I felt I needed to give back to the community as I have had so much help from others be it on Discord, StackOverflow or friends.
I feel that with most of my personal projects I spend a lot of time fiddling with things that I wish someone had given me some advice on or pointed me in the right direction before I started.
When learning new skills I often forget about how I got there and what I learned along the way, so I wanted somewhere to simply write out my notes in a blog-like format. Which will, in turn, also push me to finish my projects - “the final 5% takes as long as the first 95%“
Why Hugo and Forestry?
After finding a new found love for [Go]() about a year ago I decided to start with a quick Google for “static sites in Go” and after confirmation from my friends in the Go Discord server/hive, I decided to use Hugo to build my website templates and Forestry for writing my content.
Set up
If you can’t be asked to read anything and just want code - here is my repo everything I talk about is there 🙂.
Hugo
Hugo, I believe, has quite a painful initial learning curve - they say it is because it is so powerful but I am not so sure 😅.
To create a new site you need to run $ hugo new site nameofsite. You can install Hugo on your mac by running $ brew install hugo in the terminal.
Then within nameofsite run $ git init and sync with a remote GitHub repository (for Forrestry).
Project Structure
Hugo has three main folders within nameofsite - /content, /layouts and /static
/content is for front matter markdown files and structure for each of your blog pages and is where you will have Forestry put your posts.
/content/_index.md # content for http://127.0.0.1/
/content/blog/_index.md # needed for initialising the /blog/ folder
/content/blog/my-blog-page.md # content for http://127.0.0.1/blog/my-blog-page/
The /layouts folder is where you put the template files for displaying your content in HTML:
/layouts/index.html # with content from /content/_index.md
/layouts/blog/list.html # dynamic content to list all the blog posts at /blog/
/layouts/blog/single.html # with content from /content/blog/*.md
Finally, you have the more self-explanatory folder /static/ which is for your js, css, images folders. They are rendered at the corresponding path minus the /static/ (e.g. http://127.0.0.1/css/style.css) and are to work with your HTML pages from the /layouts folder.
Forestry
Forestry first needs to connect up to your GitHub project as it writes the content directly there - so make sure you have nameofsite on a GitHub repo.
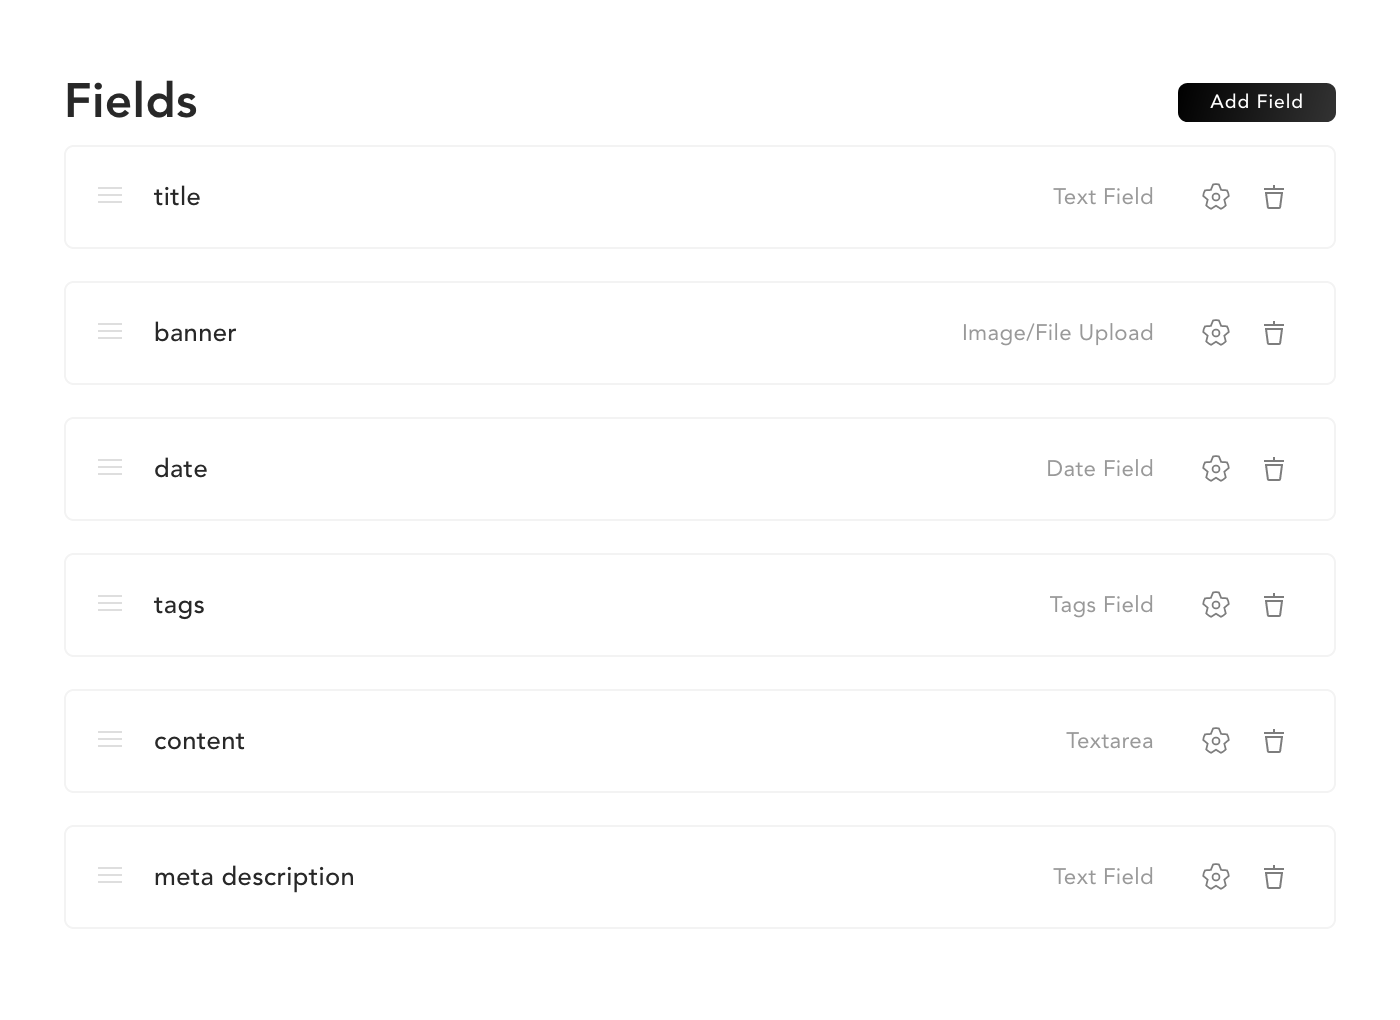
Forestry has a pretty minimal setup with a section where you create the template of your blogs called Front Matter. For my blog pages I have it set up like this:

There is then another section (in which you name when setting up) where you create pages using your templates, relative to the /content folder, on your GitHub repo.
Drafts
You can decide whether to save your pages as drafts where they will not directly be served by Hugo but still uploaded to GitHub. They can then be viewed via forestry by clicking the eye icon at the top right after setting up at settings > previews.
Docker
I have decided to use docker to help me release new versions of my site. This is arguably overkill as Docker is really meant for the infrastructure of your application and not the static files which should just be mounted into the container. But it is pretty easy to set up and release and doesn’t cost a dime apart from taking longer to deploy changes and require your server to download more than it needs to every time.
Nginx
Hugo builds the static website in the directory public/ by default but you need to convert this folder to a web server - this is where NGINX comes in.
For NGINX we need to create a basic .conf file to point to our static content (public/)
nginx.conf
server {
    listen       8080;
    listen  [::]:8080;
    server_name  localhost;

    gzip on;
    location / {
        root /usr/share/nginx/html;
        index index.htm index.html;
        try_files $uri $uri/ $uri.html =404;
    }
}
This config asks NGINX to listen on port 8080 and points to the static content folder /usr/share/nginx/html (this is the default for NGINX - often people use /var/www/ but seeing as this is in a container - who cares!)
Docker Image
To create a Docker image, we need to have a Dockerfile.
Dockerfile
FROM woahbase/alpine-hugo AS builder
COPY . /
RUN hugo --minify

FROM nginx:alpine
COPY nginx.conf /etc/nginx/conf.d/default.conf
COPY --from=builder /public /usr/share/nginx/html/
This file tells Docker-build to first create a temporary container to build our Hugo site (using the command $ hugo --minify).
After that, the Dockerfile creates an NGINX container used to host the static content and copies the static content without having all the extra Hugo application stuff to build and test the Hugo application. (This is where we could just export the output of hugo --minify to some mount point)
I believe it is really important to try and keep your docker images as small as possible - it reduces storage and bandwidth costs as well as decreasing deployment/development time.
A friend and colleague who lives in Uganda spends £5 a day on a capped 5mbit/s internet connection. It is essential that he doesn’t download large docker images.
The woahbase/alpine-hugo image is 38MB which has already been heavily reduced from the golang:alpine image at 128MB. Our NGINX image, however, is 9MB + the static files generated by Hugo - which is ~14 times smaller! 🎉
Finally, I will leave the deployment of our new docker image up to you - I use a docker swarm + Traefik which I will write a tutorial on it soon enough!


